Visual Studio Code, Glitch, and Git
Use Visual Studio Code (VSCode) to edit web-apps hosted on Glitch.
Why?
- Glitch lets you prototype quickly. It has a live editor which, while convenient, can be slow and limited. For instance, the live editor does not support code auto-completion and offline editing.
- Visual Studio Code is a full-featured Integrated Development Environment, but can be intimidating to learn without a prototyping environment to which to publish.
- Both Glitch and Visual Studio Code support Git Source Control Management (SCM) natively. Indeed, Git is how they interface.
- This presents an opportunity to learn both Visual Studio Code and Git.
- This web guide was mostly written offline using VSCode, then published to Glitch with Git! You can do it too!
Requirements, Prerequisites, and Assumptions
- This guide is written for Ubuntu Linux users. It's a leap from Windows, which may have come with your machine, but it's well worth installing. Installing VSCode and tools like Git and NodeJS is much easier in Ubuntu Linux than in Windows.
- That said, only the Installation section should be different for Windows users. As long as you can get Visual Studio Code and Git working on your Windows machine, the rest of this guide should be applicable.
- You'll know what HTML looks like.
Setup and Installation
Glitch
Head over to Glitch.com and set up an account. We recommend setting up and linking a GitHub account.
Create New Glitch Project
Click New Project and follow the wizard to create a new website project with a random name.
Your website is now live! You can navigate to it in a browser. Don't worry about the name. We'll show you how to
change it later.
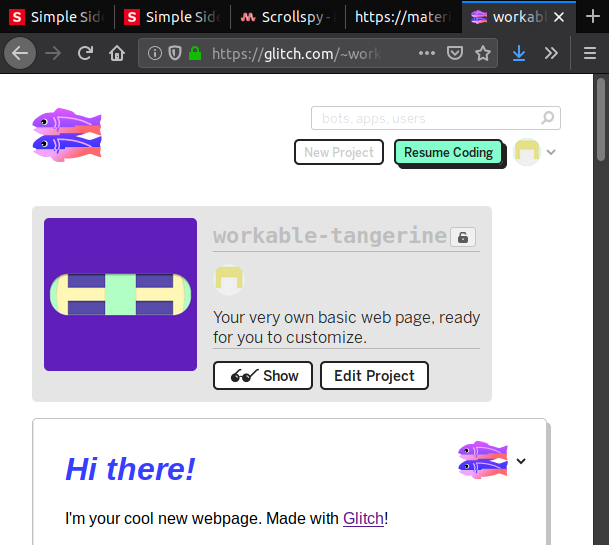
Glitch Editor
Edit your project. Note how changes you make to the code in editor take effect immediately. You can even change the name (and URL) of your project in the editor right now, without having to make any changes in VSCode.
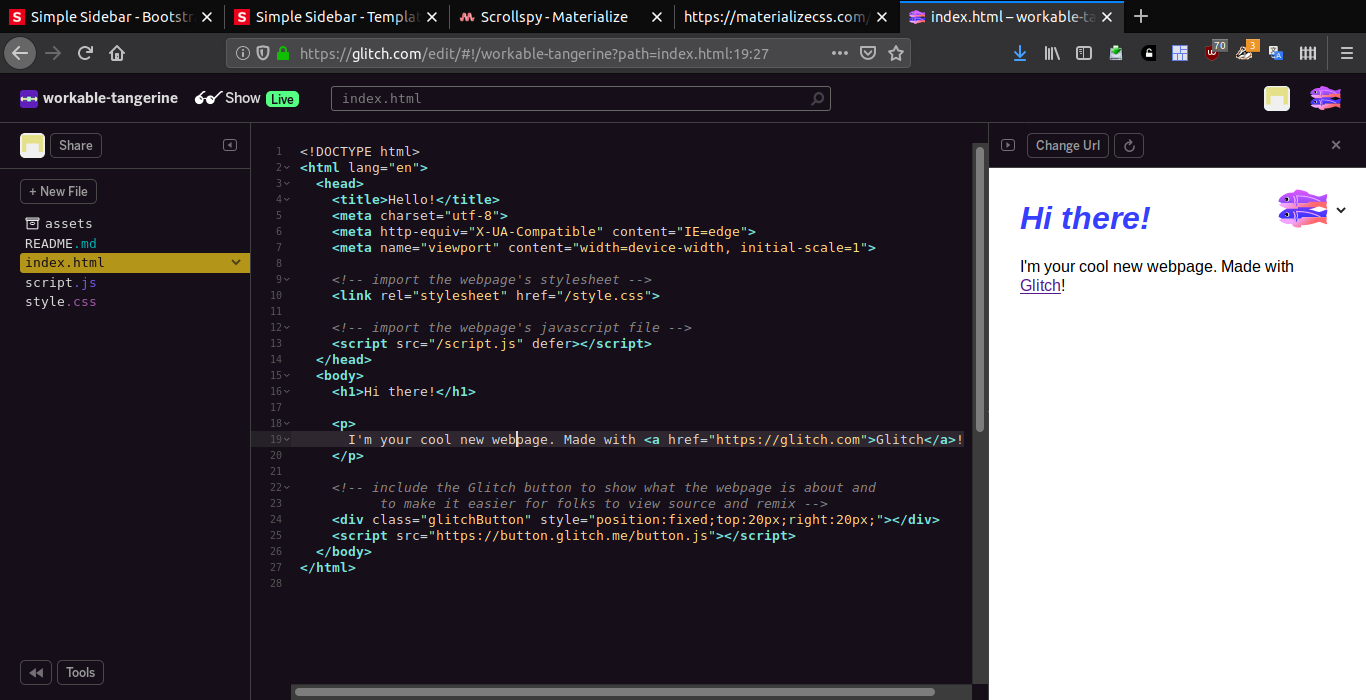
You can make cool web-apps using only the editor, but we're going to connect it to VSCode now.
Visual Studio Code and Git
VSCode supports, but is not bundled with, Git. Download and install them separately.
Windows
There will be additional installation steps on Windows to get VSCode and Git working together.
Ubuntu Linux
Ubuntu is currently the most popular Desktop Linux distribution, making installation in Ubuntu Linux easy. Installation in different Linux distributions will be slightlyy different. I will outline two methods:
Method 1: Terminal (Command Line)
Two commands:
snap install codeapt install git
Or:
Method 2: Snap Store
VSCode can be installed via the Snap Store (titled 'Ubuntu Software').
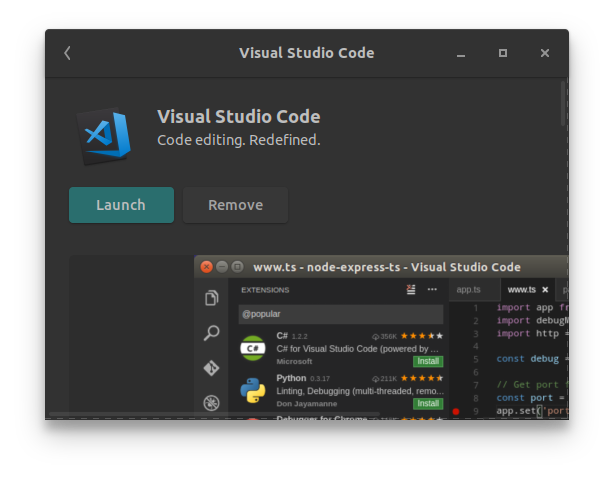
Note: You will still need to install Git using the terminal.
Clone Glitch Project into VSCode
Get Git Repository URL from Glitch.com
Find Tools in the Glitch Editor.
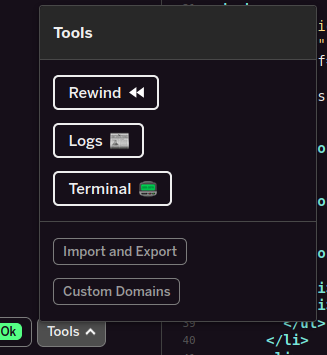
Click Import, and Export, then copy the contents of Your project's Git URL:.
In the next step, you will use this URL in VSCode.
VSCode Local Setup, Remote Clone
Create Local Project Folder
- Launch VSCode
- Open/Create a folder where you will store your project files.
File - Open Folder - Note:You can move and rename your folder any time without additional reconfiguration. More on this below.
Git Clone in VSCode
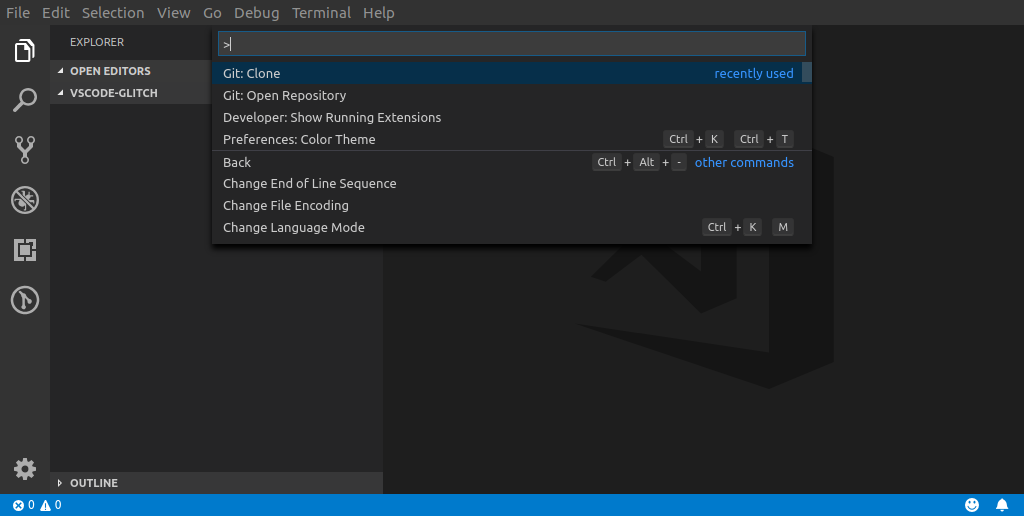
Git commands can be run from VSCode's Command Palette, an intelligent command line. The
default keyboard shortcuts for the Command Palette are CTRL-shift-P or F1
Launch the Command Palette, type Git Clone and when prompted, enter the Repository URL you
copied from Glitch.com, and press enter. You will then get to choose the folder your project's git
repository gets cloned to.
Create Branch
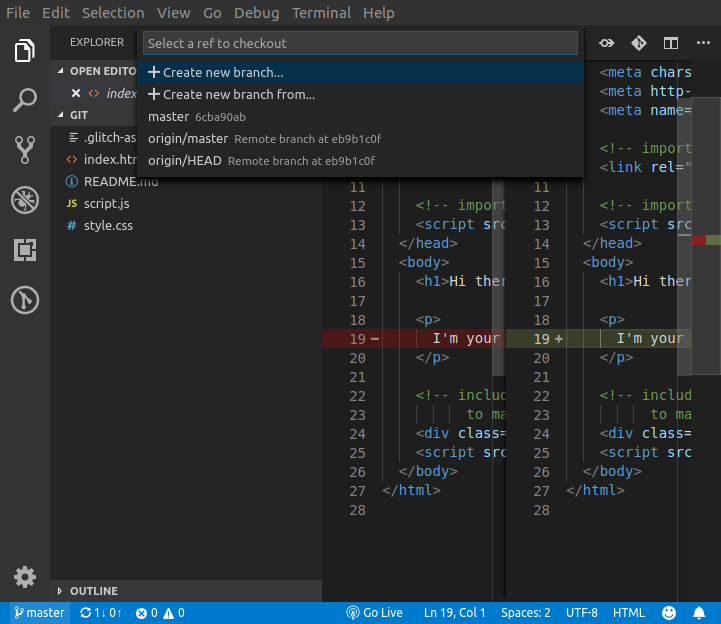
You should now be working on a clone of the 'master' branch. As shown in the bottom-left of VSCode.

Try not to edit the local master branch because by default, you won't be able to push it back to the server to override the live version. (However, there are instructions on how to enable this below.)
Instead, create a new branch by:
- Using
Git: Create Branchin the Command Palette, or - Clicking on the Git Status in the bottom-left of VSCode and choosing
Create New Branch.
Note: You will immediately 'checkout' and start working in your newly created branch. Confirm by looking at the bottom left of VSCode.
Install Extensions
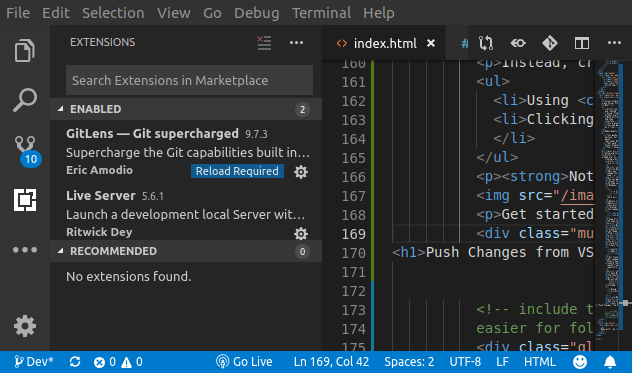
Before you start editing code, there are some VSCode extensions you can install that will make life a lot easier, namely:
- GitLens, which helps visualise git code changes.
- Live Server, which, when you press
Go Livelaunches a local web server and directs a web browser tab to it so that you can test your code locally.
Now, make some edits in VSCode. Coming up next: how to push those changes to your live website.
Push Changes from VSCode to Glitch (Hard)
This involves pushing your new local branch to the remote then using the command-line to merge the remote copy of your new branch into the master. A simpler method involving editing the master branch directly is outlined below.
VSCode - Stage, Commit, Push
Enter VSCode's Source Control section to see a list of changed files ready for staging.
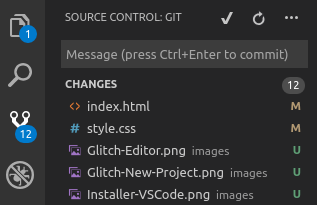
The fastest way to stage and commit your changes is to:
- Enter a message.
- Click
✔. - When the popup appears, confirm that you want to stage all changes.
- Click
…and choosePush. - You may be asked to confirm that you wish to push your code to the origin on Glitch.
Your new branch should now have been pushed to Glitch
Glitch Merge
The final step to making your changes live is to merge your branch with the master branch on the remote/origin server.
- Edit your project on Glitch.com
- Go to
Tools - Terminalto open a command-line. - Enter
git merge name-of-your-branch. - Enter
refreshto refresh your project - Test that your changes are live on your Glitch website.
Not only are the changes to your website live, but they will also be visible in the Glitch Editor.
Push Changes from VSCode to Glitch (Easy)
Although the more indirect method outlined above is preferable, This simpler method is good if you have:
- Made changes in your master branch rather than in a new branch.
- Conflicts you can't seem to resolve.
- Errors using the other method.
Note: You can work in both your master and a new branch, but beware confusion.
Glitch - Allow changes to live master
- Edit your project on Glitch.com
- Go to
Tools - Terminalto open a command-line. - Enter
git config receive.denyCurrentBranch updateInstead.
As previously mentioned, Git on Glitch does not allow changes to be pushed to master by default . This changes that setting.
VSCode - Stage, Commit, Push
Enter VSCode's Source Control section to see a list of changed files ready for staging.

The fastest way to stage and commit your changes is to:
- Enter a message.
- Click
✔. - When the popup appears, confirm that you want to stage all changes.
- Click
…and choosePush. - You may be asked to confirm that you wish to push your code to the origin on Glitch.
Your master branch should now have been pushed to Glitch
Glitch Git Reset
The final step to making your changes live is to reset Git.
- Edit your project on Glitch.com
- Go to
Tools - Terminalto open a command-line. - Enter
git reset --hard. - Enter
refreshto refresh your project - Test that your changes to your web-app are live.
Pull Changes from VSCode to Glitch
If you have made subsequent changes in the Glitch Editor, you will want to pull them into VSCode and synchronise your code.
- First, wait about 10 minutes for changes made in the Glitch Editor to propogate to the remote git master repository.
- Look to the bottom left of the VSCode window to confirm which local repository you want changes pulled into.
- Enter the VSCode Source Control section.
- Click
…. - To pull from the same repository, e.g. master-into-master, choose
Pull. - To pull into a repository with a different name, e.g. master-into-Your-Branch, choose
Pull from, selectorigin, then selectorigin/master. - As an alternative to using the GUI, launch the Command Palette (default:
F1orCTRL-shift-P) and typeGit: PullorGit: Pull from
Rename Project/Move Folder (Optional)
'Rename' could mean two things:
- Rename or move your local code folder.
- Rename your project and its URL.
They're both simple, and will be covered in one go.
Rename/Move Local Code Folder
- Go ahead and rename or move your code folder.
- Once you reopen it in VSCode, Git will track any future changes to files without reconfiguration.
- Note: If you're having difficulty finding your files to reopen, they may be stored in the
gitsubfolder within your code folder.
Rename Glitch Project and URL
Glitch will often give your new project a random name and matching URL. You can change it any time in Glitch. However, since the URL of the remote Git repository will also change, you will need to reconfigure Git.
- Open your project in Glitch, click on its name, and rename it.
- Edit your project in the Glitch Editor.
- Return to
Tools, thenGit, Import, and Export. CopytheReadURL.- On your local PC, enter your code folder, search for the
.gitsubfolder (it may be in thegitsubfolder). - Edit the
configfile in a text editor and replace theurlvalue with the URL you just copied.
e.g. old config file snippet:
[remote "origin"]
url = https://api.glitch.com/workable-tangerine/git
new config file snippet:
[remote "origin"]
url = https://api.glitch.com/new-project-name/git